Whether you’re an author or a reader, Goodreads is a busy, complicated website. There’s so much going on that it can be hard to figure out not only where to find information, but how to change and customize that information as an author.
Wouldn’t it be great if readers could click on your books directly from your profile page, without having to scroll down or scan all the other busy sections on the page?
So, how can you add clickable book covers to your author profile on Goodreads?
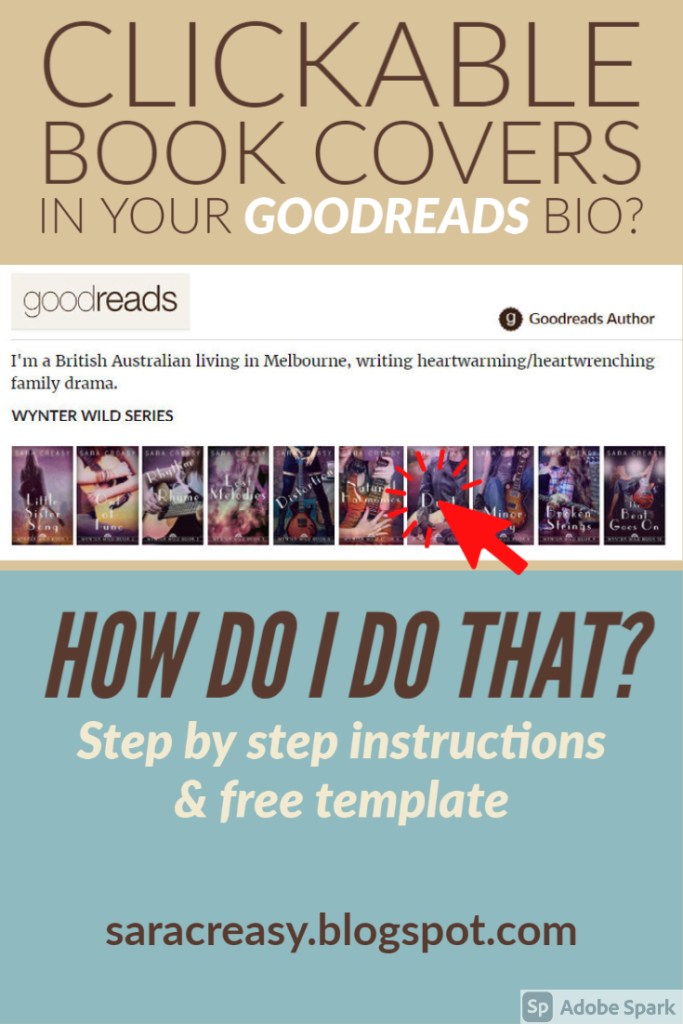
Read on for step-by-step instructions, along with a downloadable template for the HTML code.
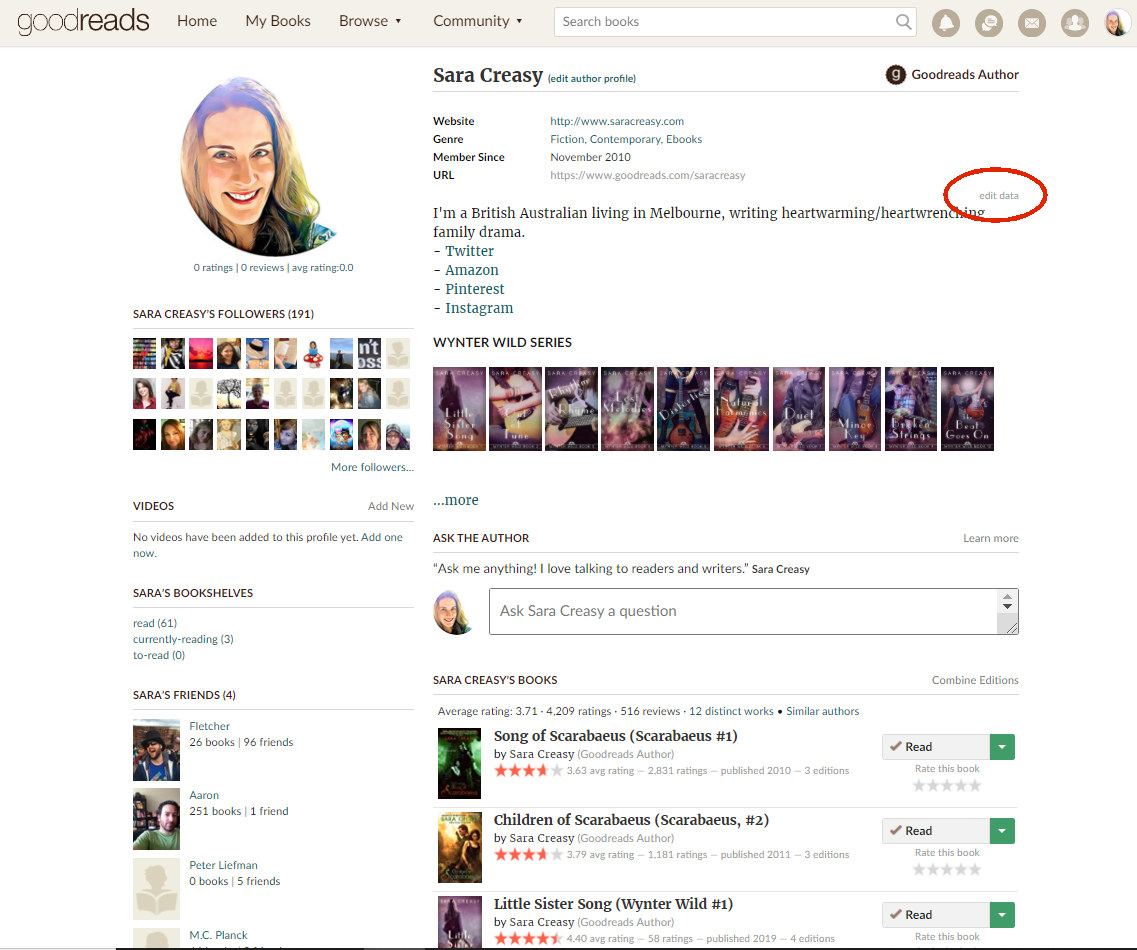
This is my author profile page, as an example, showing the clickable book covers displayed in my bio. You can navigate to any author’s profile by clicking on their name from a book page, or get to your own from Goodreads.com by going to your tiny profile pic at the top right and clicking Profile.
See my pitiable number of friends (literally only my husband and a few real life family/friends)? The reason I’ve neglected Goodreads is because I simply couldn’t find my way around it. My goal this year is to make better use of it, especially as an author.
The reason I wanted my book covers up the top is because readers otherwise have to scroll down to the “Sara Creasy’s Books” area – which gets pushed even lower if you have a bunch of questions in the “Ask the Author” section (I just deleted the Q&A because most of the questions related to my old books). And as you can see, the books in my Books section are listed by “popularity”, so my old sci-fi books are at the top. I’d prefer my Wynter Wild series at the top, but it’s not possible to change the list order.
A nice display of clickable covers right in my bio was the solution. How did I do it?
Here’s a step-by-step guide. (Note: Screenshots are for the website, not the app.)
Step 1: Get organized
Before you start, download my full template from Dropbox. (Either copy and paste the text that appears when you click the link, or download the txt file using the “Direct download” button at the top right of the Dropbox screen.) No sign-up required.
The screenshots below assume you’re typing the code from scratch, but the template includes all the final HTML for five books. Add or subtract for however many titles you need.
If you do prefer to type your code from scratch, I still suggest using a text editor (Notepad, Word, etc.) and saving as you go, rather than typing directly into the Goodreads bio page.
Don’t worry if you have no HTML experience. It’s a very short simple piece of code with placeholder text that you’ll be replacing with your own URLs (internet addresses).
Step 2: Type the template code
Type the template code into your text editor (or start with the code in the template):
Copy and paste this for as many books as you want to display. So, for a 5-book series it will look like this:

Everything in [square brackets] (including the brackets themselves) needs to be replaced for each book. All the other parts of the code, such as angled brackets and quote marks, must be included.
- The a href tag creates a hyperlink, which is what this entire piece of code is, and you need to close it off at the end with the /a tag. (All tags must be within angled brackets.)
- The img src tag calls up an existing image, which is the book cover hosted on Goodreads.
- The height tag is how large you want the image to be. I’ve not used the width tag, since the image will scale correctly, but it’s good coding practice to include it. I’m keeping things super-simple, folks!
- The alt tag is “alternative” text to make the entire thing accessible to users who are listening to their browsers rather than viewing it (e.g. sight-impaired users).
Step 3: Replace the placeholders
For each book, you need to find and copy the book’s Goodreads URL [BOOK LINK], and its cover image URL [IMAGE LINK].
The book URL is the web address of your book page. Highlight and copy it to your clipboard, then paste it into the template to replace [BOOK LINK]. (Remember to delete the square brackets.)
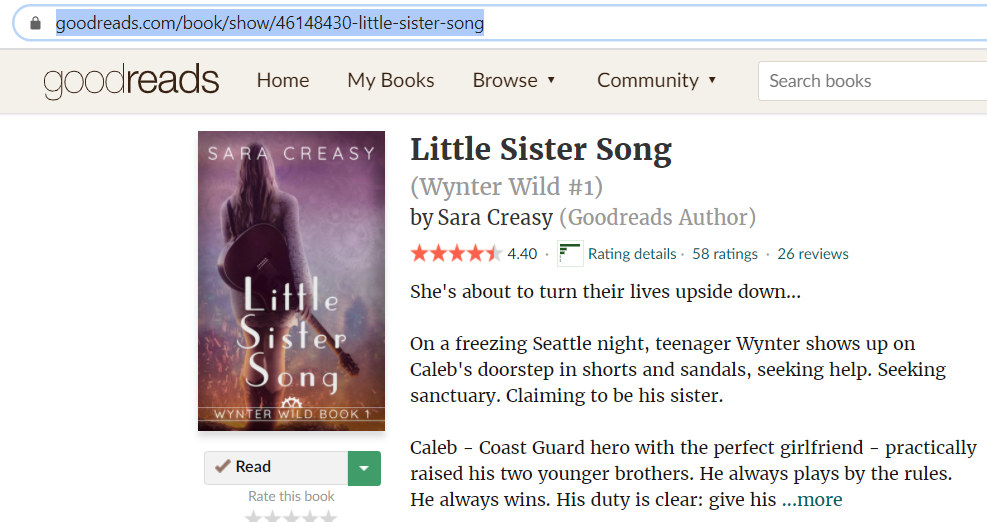
To get the address for the book cover image URL, right-click on the book cover from that same page and select “Copy image address” (Chrome) or “Copy image location” (Firefox).
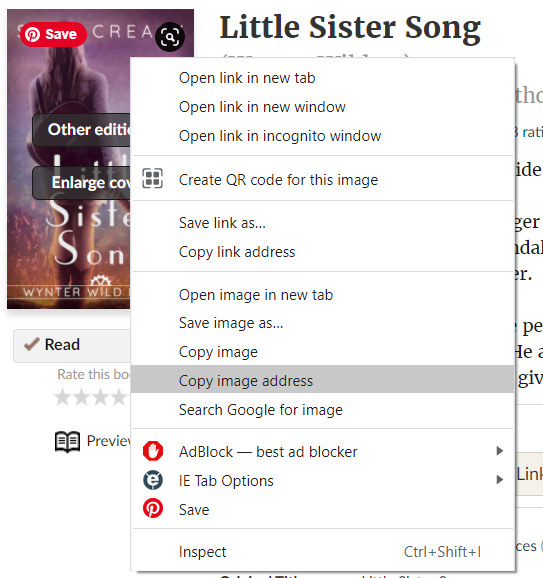
Paste this URL to replace [IMAGE LINK] in the template.
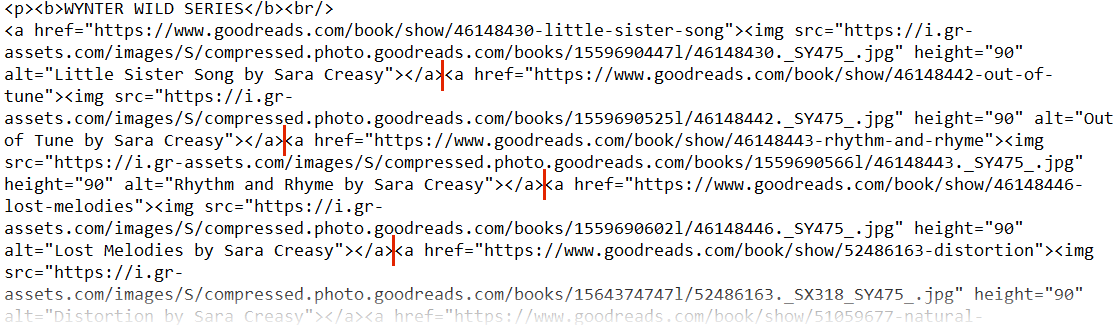
Your line of code will now look something like this – I’ve highlighted the book page in blue, the image in red, and I’ve added the alt text for accessibility in yellow. Don’t worry if the (soft) line breaks appear to break up the code in weird places.

I set the image height to 100. You can change this after you view your final page. (I ended up changing it to 90 so that all the books fit in one row.)
Step 4: Add the start and end code, and subheadings
These bits of code are already in the template. Type a new paragraph tag at the very start of the code, and a closing paragraph tag at the very end:

To add a subheading (see my profile above, where I have the subheading WYNTER WILD SERIES in bold), simply enclose it within bold tags, followed by a line break tag:

Step 5: Create one line of code
If you have multiple books listed and want them to appear one underneath the other, the code is ready to go.
However, if you want them to appear in a single row, as I did, you need to join all that code into one long line. Obviously it won’t look like one long line in your text editor or on the Goodreads edit page, but the line breaks will look rather random after you’ve joined it all up. Below, the red lines indicate where I backspaced to join the lines together.
The reason we started with separate lines and joined them up at the end is that it’s hard to navigate code when it’s not broken up into lines.
Step 6: Paste the code into your bio
From your profile page, click “Edit Data” (circled in red in my profile screenshot above) and scroll down to the Biography box.I recommend grabbing the little handle at the lower right of the box and dragging it out wider before you start.
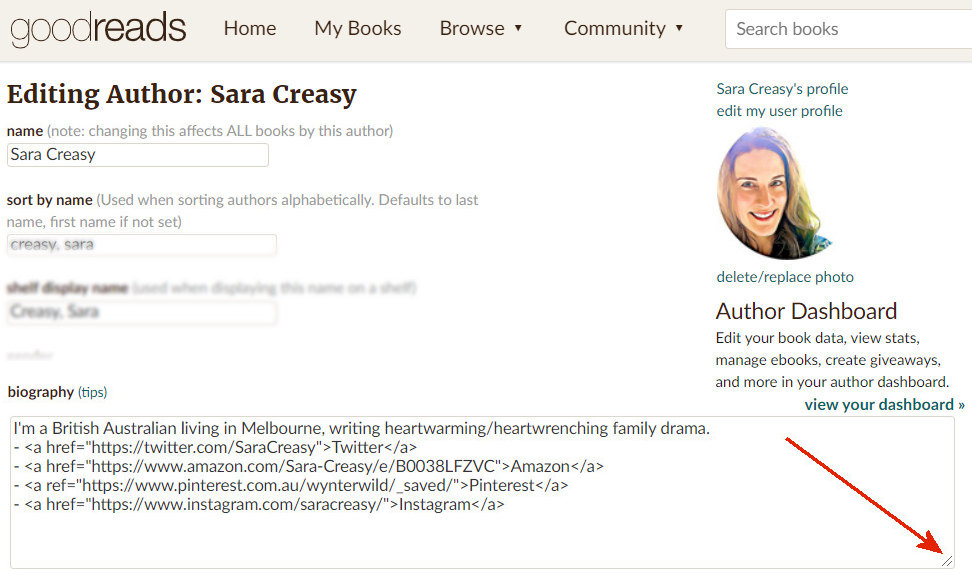
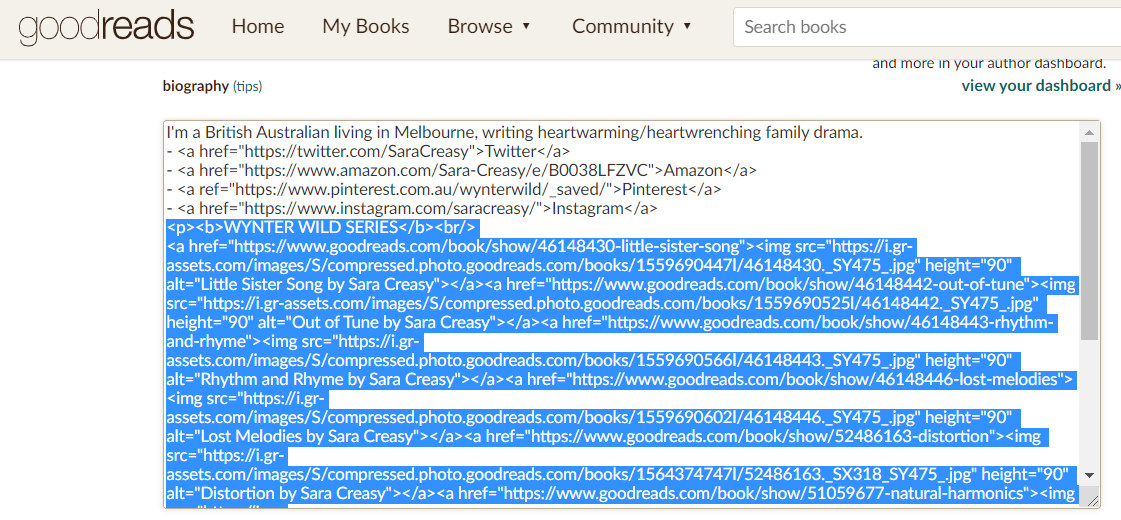
I’ve already written a short bio, along with links to social media. My book covers are going to appear below that.Copy and paste the block of code from your text editor/template. Here I’ve pasted all ten of my books (highlighted blue):
Click SAVE (bottom of the page) and you’ll be taken to your revamped profile page with all your gorgeous books listed right there in your bio!If things aren’t looking quite as you anticipated, don’t panic. Return to the edit page and check your code – that initial code needs to be exactly right.Don’t forget you can play around with the image dimensions (height=”__”). You can also add another subheading with more covers if you need to split your books up into separate sections (if you have multiple series, for example). Just add the subheading before the last /p tag, using line break tags br/ as needed.
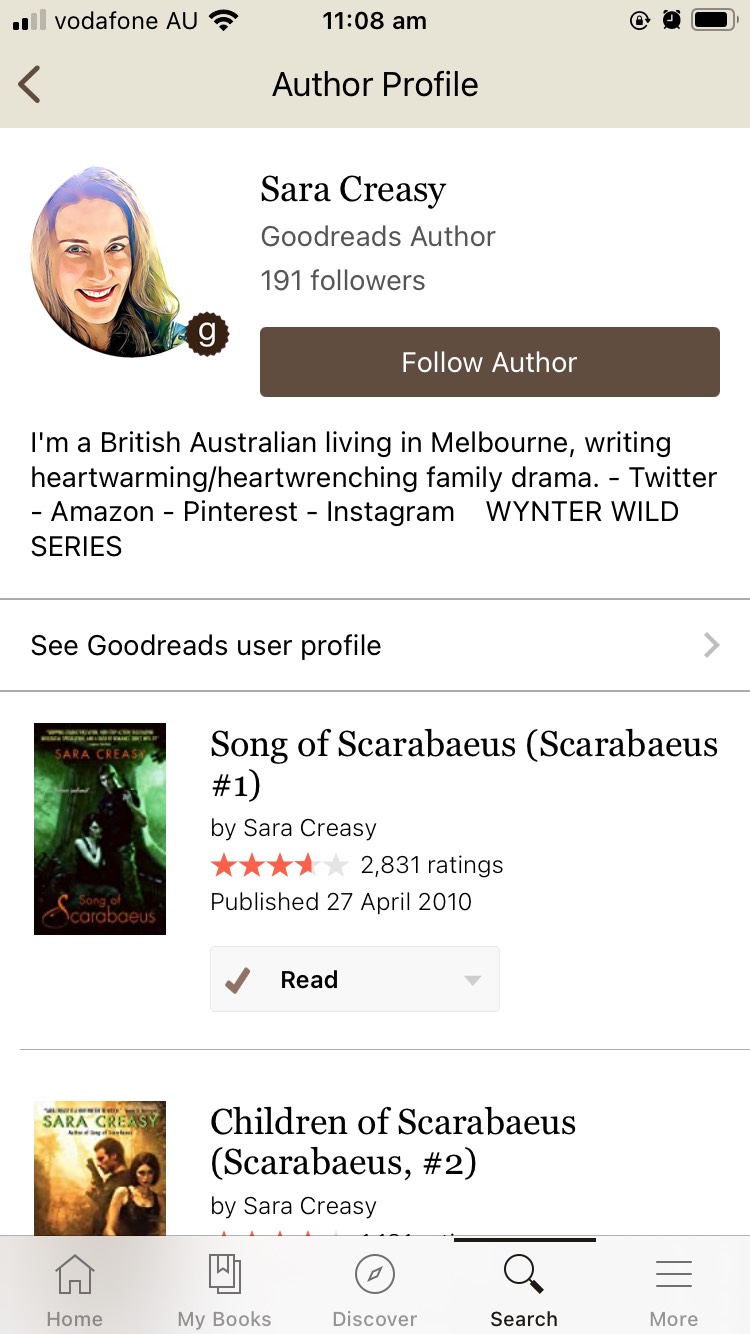
A note about the app
The app does not display images in the author profile – in fact, everything is cut back for the app. However, it will display any subheading text. My author profile on the app therefore looks like this, with WYNTER WILD SERIES just sort of tacked on there, but at least that tells people what I’m writing to counteract the fact that my old science fiction books are the only other thing they can see!Note that none of those links (Twitter, Amazon, Pinterest, Instagram) are clickable on the app.